- Made to measure by a carpenter
- Made in Germany
- Free delivery (DE)
Measure correctly
To ensure that your ramp fits perfectly later on, we have put together a few tips for you here on how to measure your threshold correctly. If you pay attention to them, nothing will stand in the way of your perfect doorstep ramp.
Please note:
All dimensions are given in millimeters (mm ). 10 mm correspond to 1 cm.
To get the measurement in centimeters, you have to divide the millimeter value by 10 and vice versa.
e.g.:
1 cm = 10 mm
89 cm = 890 mm
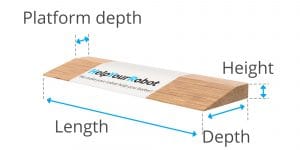
Ramp length
The ramp length corresponds to the length of the ramp along the threshold from left to right.
Option 1:
The door frame extends to the the lower floor level.
In this case, the ramp length should correspond to the distance between the two inner sides of the door frame. You should use the Configure the ramp length to be about 2 mm shorter than you measured so that the wood can work.
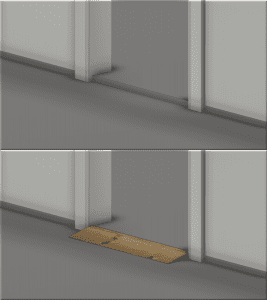
Option 2:
The door frame extends to the upper floor level (after renovation).
In this case, the ramp length should correspond to the distance between the two outer sides of the door frame to create a homogeneous overall appearance. As the upper floor level is usually used as the basis for installing new doors where there are height differences between rooms, there is a free space under the projection of the door frame in the direction of the lower room. In this case, we recommend the configuration of a platform that adjoins the sloping part of the ramp. and underlays the overhang of the door frame.
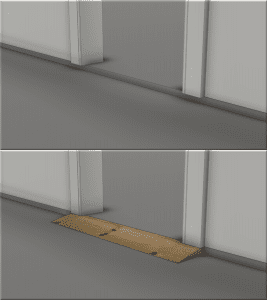
Course of the ramp
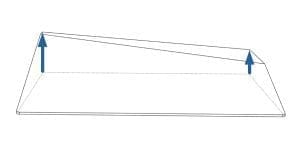
The height of a threshold in the house is often not uniform, so that you measure a different value on the left-hand side of the threshold than on the right-hand side. You can select this via the “History” entry in the configurator. The indications “left” and “right” are always to be understood as looking up the ramp.
Option 1:
Straight
Your threshold runs at a uniform height. You can select the “Straight” option in the “Course” entry of the configurator and specify a height that is reached uniformly over the entire length of the ramp.
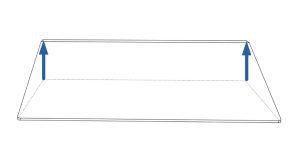
Option 2:
Oblique
Your threshold has different heights on the left and right. You can select the “Slanted” option in the “Gradient” entry of the configurator and specify a height for the left and right. The transition between the heights is represented by a linear progression of the ramp height.
Ramp height
The ramp height corresponds to the height difference that is to be overcome with the help of the ramp. The height of the door threshold from the lower to the upper level is measured. If the ramp is installed with the optionally available mounting tape, there is no relevant allowance (approx. 0.15 mm), so this type of installation does not have to be taken into account when configuring the ramp height. If the measured height is between two mm increments, it should always be rounded down to the next smaller millimeter increment (e.g. measured 32.6 mm is rounded down to 32 mm ramp height).
Pedestal
The platform connects horizontally to the sloping part of the ramp. It can be used,
- if otherwise the door frame or a shortened door protrudes into the lower room. The pedestal underpins this overhang and thus ensures a homogeneous overall appearance.
- to specifically increase the overall depth of the ramp or simply
- for optical reasons
Gradient
We offer two different incline angles for our door threshold ramps. The standard incline of 15° is suitable for almost every robot hoover on the market. The only known exceptions are the models from the manufacturer ECOVACS and the Roborock S7. For these cases, we recommend the “Flat” slope variant with an angle of 10°.


